How To Add USB Storage to a Wi-Fi Router
In today's connected world, the need for additional storage space is constantly growing. With the increasing number of smart devices, such as smartphones, tablets, and smart TVs, it's essential to have a centralized storage solution that can be easily accessed by all devices on your Wi-Fi network. Here, we will walk you through the convenient way of adding USB storage to your router and sharing it with your Wi-Fi network.
Share a USB Drive With Your Wi-Fi Network
Adding USB or USB-C drives to your Wi-Fi router allows you to create a centralized storage solution that can be accessed by multiple devices on your network. This can be especially useful for storing media files, such as movies, music, and photos, which can then be streamed or shared with other devices. To share a USB drive with your Wi-Fi network, follow the steps below.
Adjust Router Settings
The first step in adding USB storage to your router is to adjust the router settings to enable the USB port. Here's how to do it:
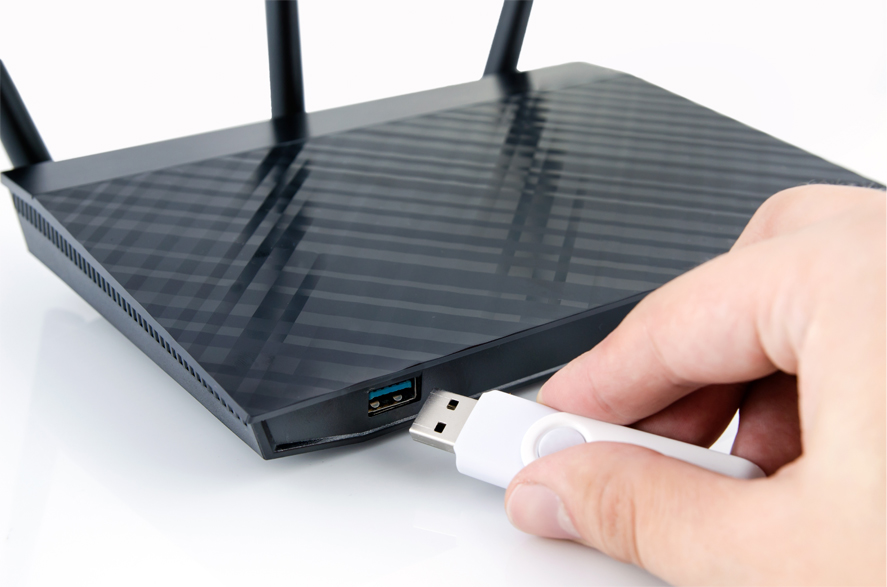
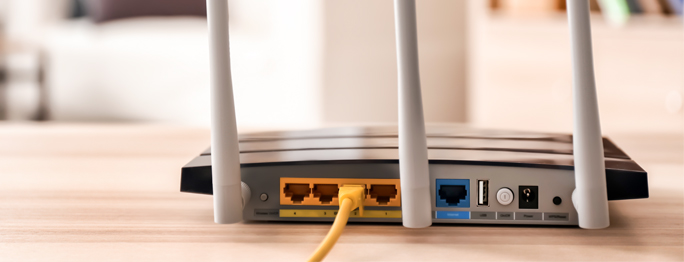
- Connect the USB drive to the USB port on your router. Most modern routers come with a USB port that allows you to connect an external USB drive directly to the router.
- Access your router's administration page. Open a web browser on a device connected to your router, and enter the router's IP address in the address bar. This IP address is usually printed on the router or mentioned in the router's manual.
- Log in to your router's administration page. Key in the login credentials for your router. If you have not changed these credentials, you can find them in the router's manual or on the router itself.
- Navigate to the USB settings. Once you are logged in to your router's administration page, look for the USB settings or storage settings option. This may vary depending on the router brand and model, but it is usually found under the Advanced or Settings tab.
- Enable the USB port. In the USB settings, you should see an option to enable the USB port. Click on the checkbox or button to enable the USB port. You may also have the option to configure other settings, such as file sharing, user access, and media server settings, depending on your router's features.
- Save the settings. After making the necessary changes, click on the Save or Apply button to save the settings and enable the USB port on your router.
Get Competitive Pricing on Bulk Flash Drives From USB Memory Direct
Mac vs. PC Process
The process of adding USB storage to a Wi-Fi router may slightly differ depending on whether you are using a Mac or a PC. Here's a brief overview of the process for both platforms.
For Mac Users:
- Connect the USB drive to the USB port on your router.
- Open Finder and go to the Go menu in the top menu bar.
- Choose the Connect to Server option from the menu.
- Enter the router's IP address in the server address field, preceded by smb:// (e.g., smb://192.168.1.1).
- Click on the Connect button.
- Enter the username and password for your router if prompted.
- Once connected, you should see the USB drive listed as a shared folder. You can now access and use the USB drive as a centralized storage solution for your Mac.
For PC Users:
- Connect the USB drive to the USB port on your router.
- Open File Explorer, and go to the Computer or This PC section in the navigation pane.
- Click on the Map network drive button. In the Map Network Drive window, select a drive letter from the drop-down menu. This will be the drive letter that will be assigned to the USB drive when connected to your router.
- In the Folder field, enter the router's IP address in the following format: \192.168.1.1\USB (replace 192.168.1.1 with your router's actual IP address).
- Check the box next to Connect using different credentials if you need to enter a username and password to access the USB drive. Otherwise, leave it unchecked.
- Click on the Finish button to map the network drive to your PC.
- If prompted, enter the username and password for your router to access the USB drive.
- Once connected, you should see the USB drive listed as a network drive in your File Explorer under the drive letter you selected. You can now access and use the USB drive as a centralized storage solution for your PC.
Besides the basic steps above, some routers may have additional settings or features that you can configure, such as file-sharing permissions, media server settings, and user access controls. You can explore your router's administration page to customize these settings according to your needs and preferences.
Final Thoughts
Adding USB storage to your Wi-Fi router can provide a convenient and centralized storage solution for your network, allowing you to store and share files among devices. By adjusting your router settings and following the steps outlined above, you can easily add USB storage to your router and enjoy the benefits of expanded storage, media streaming, and easy file sharing.