How to format a USB flash drive on Ubuntu 18.04
The assumption is that if you are rocking Linux in any flavor you are a world renowned hacker extraordinaire, but that isn't always the case. Luckily for you formatting a flash drive on Linux is pretty straight forward and will only take a few minutes.
Before we get started though a word of warning: formatting a USB flash drive or external hard drive will wipe the data contained therein. So before you format anything, backup your important files.
We will be changing a flash drive from FAT32 to exFAT. The exFAT file system is compatible with every operating system and is a more modern version that eliminates the 4GB file size limit of FAT32. So for this guide when you see exFAT just know you can replace that with any file system.
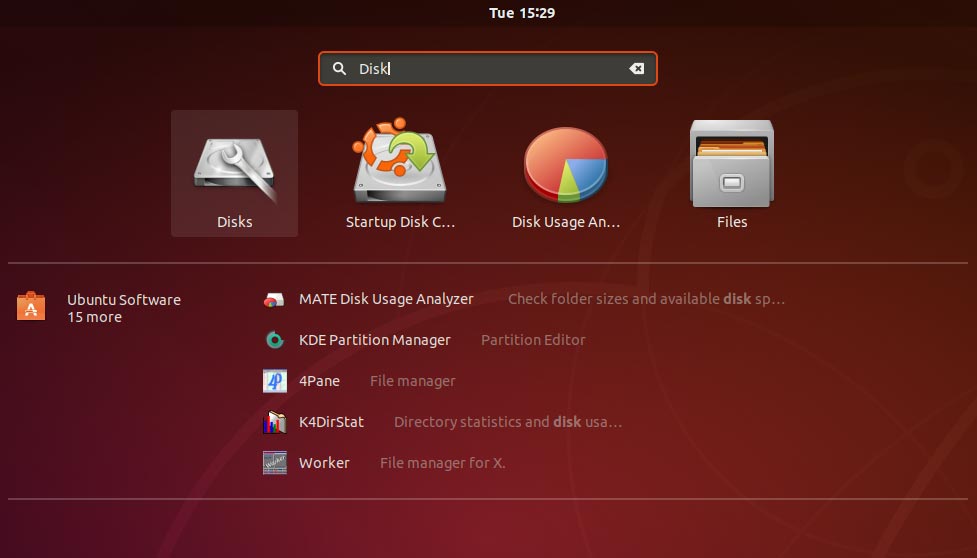
Step 1: Open up the disk utility
If you are using a standard installation of Ubuntu desktop you can click the Tile Icon on the bottom left or hit the Windows/Super key to bring up the application search menu.
From the search window type "Disk" and you will see an icon that looks like a hard drive named Disks, click it and a window will pop up showing you the disks in your computer.
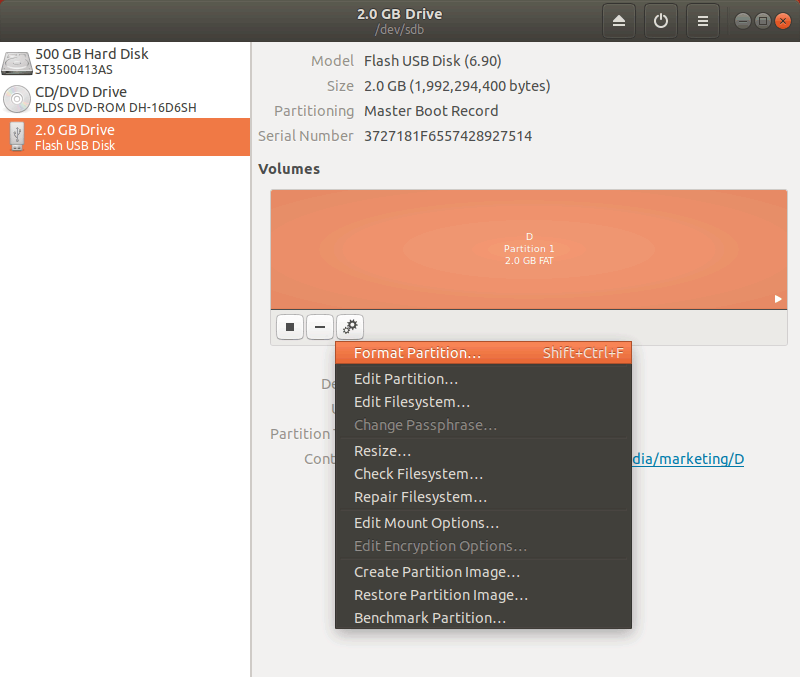
Step 2: Select your flash drive and open the format dialog box.
The Disks utility is what we will use to format the flash drive. It's a very straightforward utility to use if you know where things are located. It will be helpful if you only have the flash drive you want to format plugged in, the clutter might get confusing and you may inadvertently format the wrong drive.
To get the format dialog box open follow the steps below:
- From the left pane of the Disks utility select your flash drive.
- Once you've selected your drive, on the right pane locate and click the settings cog.
- From the dialog that opens select Format Partition.
Step 3: Format your USB flash drive
It might sound simple, but there are still a few more steps in Ubuntu until you can actually carry out a format operation, but they are easy. We need to choose a Volume Name for our flash drive, which is just a fancy way to say name it. We also will need to explain what file system we want to put on there, since exFAT isn't a default we need to choose "Other" at first:
- In Volume Name choose a name, any name, for your flash drive
- Select Other for Type
- Click Next
- On the following screen choose exFAT (if not available see below)
- Click Next
- Click Format
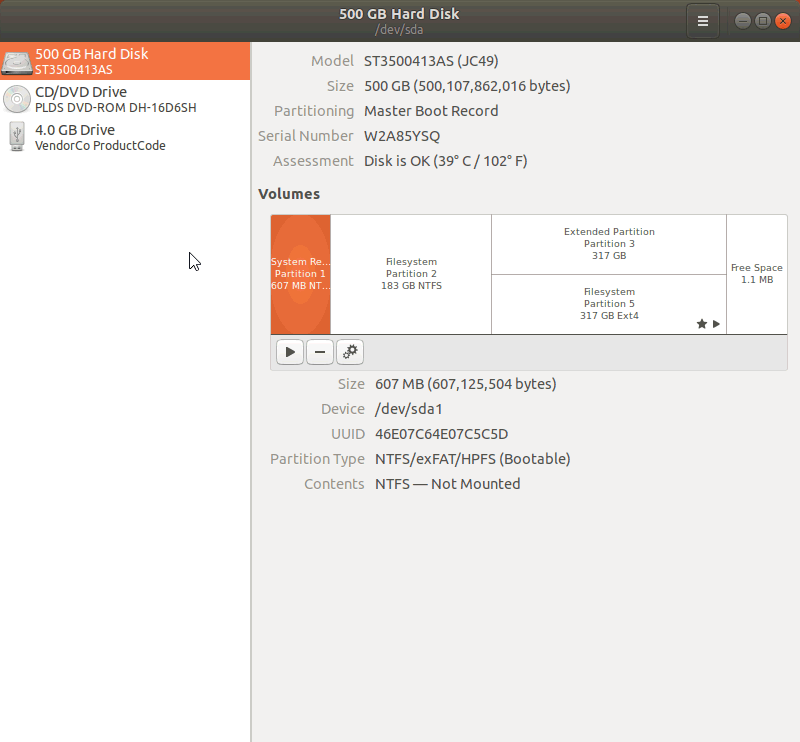
That should be it, now you can see on the Disk utility information pane for your flash drive that the file system is exFAT, as it is in our example.
Don't forget to eject your flash drive from your computer, failing to do show can leave half written data on your drive. This often shows up as corrupt files like images with lines through them. It can even damage the file system and send you back to square one, but at least you know how to do it!
Troubleshooting the formatting process
Sometimes things won't go smoothly, they didn't for us when we were writing this guide. But fret not, the solution is always simple.
exFAT is not in the Custom Format List
While drives that are formatted with an exFAT file system can be accessed by Ubuntu from a default installation, it isn't possible to create new exFAT file systems with just a basic Ubuntu installation. We need to install the exFAT utility in order to do so. This is going to be a bit more technical so if you aren't sure about something you might reconsider doing it.
Opening terminal to run commands.
Firstly, we need to open up Terminal. The same way you opened the Disk utility in the previous section is how you can open terminal. Open program search and search for terminal:
- Click the Tile Icon on the bottom left of your screen, or hit the Windows/Super key.
- Type Terminal
- Hit enter, or click on terminal
Installing exfat-utils via command line.
Now we're going to execute a command to install the utility we need in order to create new exFAT file systems: exfat-utils. Copy and paste the following commands into your terminal and hit enter after you paste each one.
This command will update the available software list. That way when we install exfat-utils we will install the latest and greatest version:
sudo apt-get update
This will install exfat-utils:
sudo apt-get install exfat-utils
You should now be all set, close and reopen the Disks utility and retry the formatting process.