10 Tips on How to Reformat a Flash Drive
Flash drive reformatting is a configuration process for erasing data, changing to another operating system, or resolving storage issues. But what are flash drives? Flash or thumb drives are small, portable data storage devices for Windows or Mac operating systems (OSs).
Learn how to format a flash drive to make space for more files or to change operating systems. If your organization uses Windows 10 and Mac, here are helpful tips for reformatting flash drives.
USB-A vs. USB-C: Understanding the Differences
Before discussing the reformatting tips, we will cover the differences between USB-A and USB-C. You should find the topic, USB-A vs. USB-C, helpful in determining which port type you have on your flash drive.
USB-A is an original port allowing you to connect a flash drive to your PC. For years, it has been popular among users. Most PCs and laptops have built-in ports for directly inserting thumb drives.
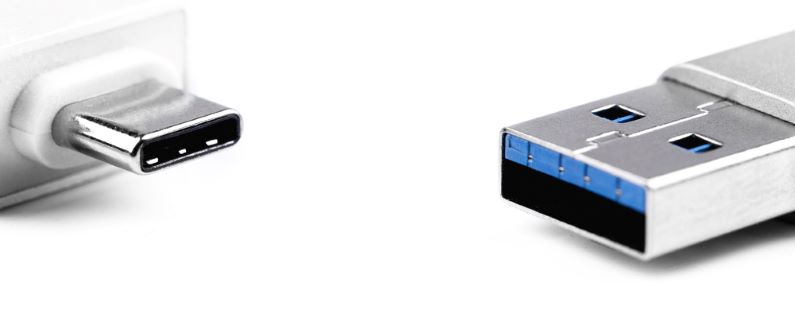
USB-C is a device that features a new connector type. In the late 2010s, consumers globally started implementing storage devices for personal and business uses. One difference between the two technologies is that USB-C is smaller than USB-A. And the former has higher power and faster data transfer capacities.
Understanding the differences between USB-A and USB-C ports is essential for learning how to reformat a thumb drive.
Purchase USB Memory Direct Bulk Flash Drives!
Tips for Reformatting Flash Drives on Windows OS
Use the following tips to help you reformat your flash drives. We will begin with Windows operating systems.
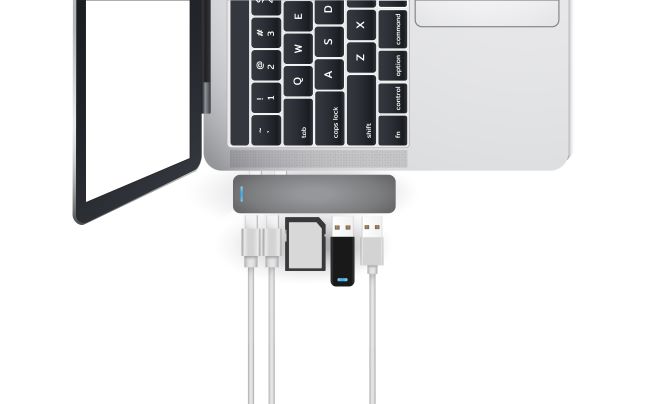
1. Insert the Flash Drive Into Your Computer's USB Port
Look at the back, front, or side port of your computer. Then, insert the flash drive, such as a USB-C memory stick.
2. Open the Computer or This PC Window
If your operating system is Windows Vista or 7, click Start and then Computer. For versions 8 and 8.1, search the term "computer" from the Start menu and click Computer. Users of version 10 can use the search bar from the Start screen and click This PC.
Next, regardless of any OS mentioned above, right-click the drive icon.
3. Click Format From the Menu
Under the file system in the format window for the device name, click the drop-down arrow and select FAT32. Click OK after you see a warning that formatting your flash drive will delete all your stored data. When a message appears that the format is complete, you need to click OK once again.
4. Close the Format Device Name and Computer or This PC Windows
Close the format device name or drive letter window by simply clicking Close. To get out of the Computer or This PC, click X in the corner, top-right of the window.
5. Remove Your Flash Drive From the USB Port
Before moving your flash drive, you must eject the drive. Start storing your important documents, videos, photos, and other files. Your device should have optimum performance by saving and deleting your data.
Shop the USB Memory Direct Collection
Tips for Formatting Flash Drives on Mac
For the Mac operating system, the formatting process is similar. Below are the detailed tips.
1. Connect the Flash Drive to Your Mac Computer
For a Mac, connect your flash drive by inserting it into the port and opening Disk Utility. Other options to open the utility are using Utilities, Finder, or Applications.
2. Select the Drive
On the left panel, click to select the storage device. Look for the Erase tab and click it.
3. Erasing Your Flash Drive
To erase the content on your thumb drive, click the MS-DOS FAT selection box in the volume format. If asked, add a disk name, then click Erase to start deleting the data. You will receive a confirmation dialog.
4. Complete the Reformatting Process
When the formatting is complete on your Mac computer, click Done. You are all set to start storing your documents and work files.
5. Close Disk Utility and Remove Flash Drive
Now that you erased your flash drive, close the Disk Utility window. Remember to eject the thumb drive before removing it from the port on your Mac PC.
To protect your data and information, take advantage of the flash drive security features.
Conclusion
USB Memory Direct offers a flash drive in USB-C, leather, wristbands, wooden, and business cards. Contact us to get a quote on our bulk flash drives. We offer over 50 different styles of storage devices with customizable features.